
You just received your Rockit 88 delidder and now what??
While the delid tool is super easy to use, let me outline the procedure just to be on the safe side.
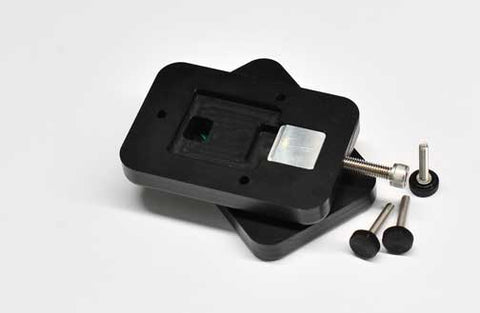
First, make sure the large screw is backed out enough to let the pusher slide all the way to the back.
Next, insert your CPU. Line up the triangle on the corner with the triangle carved into the tool.
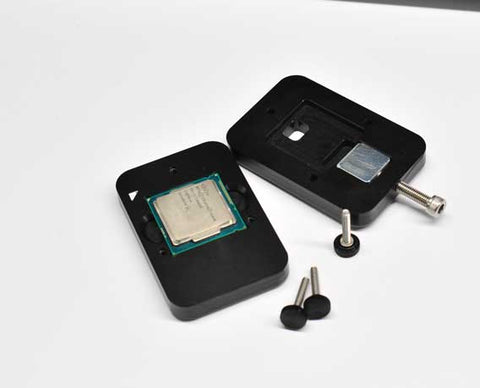

Next, flip the top over onto the bottom, you can't hurt the CPU but you do want to make sure the 3 holes are roughly lined up and the little silver screw is pulled all the way back. This will allow the top to drop down completely onto the bottom and trap the CPU.
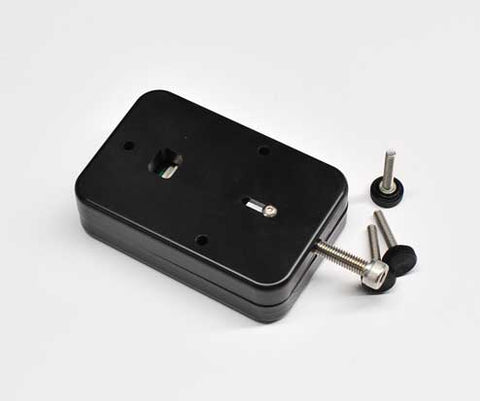
Drop the three screws into the holes and wiggle the top around until they fall into the three holes in the bottom. Screw them down. Don't crank them down, just snug them up a little. The tool is designed to work with the screws finger tight. If you tighten them too much they become difficult to remove and you end up cussing as you try to loosen them after the delid. Really, finger tight is plenty.
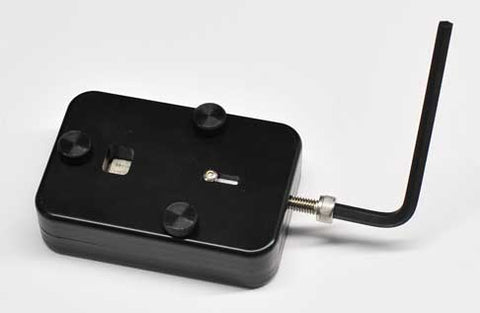
Go ahead and insert the allen key like in the photo.. it's ready to delid at this point.
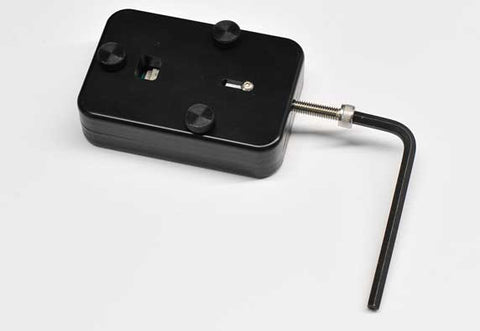
Take the tool in your hand or bring it to the edge of the table so you can spin the allen key. Soon it will contact the CPU and you'll feel the resistance. I like to take it in my hand at this point as the actual delid takes some force.
Soon you'll hear that POP of the adhesive giving up the ghost. The small screw will be at the end of the travel and you should see the lid has moved out of normal position. Go ahead and back the allen out a little to relieve the pressure.
Back out the three screws and lift up the top. There sits your freshly delidded CPU!

Good luck with your overclocking!
Feel free to contact me if there are any problems, complaints or you need clarification on anything.
Thanks
James